Can You Paint a Crib?
Do you want to make your baby's nursery more beautiful? You might be wondering if painting a crib is safe. In most circumstances, provided you follow specific rules for crib material, paint choices, and ventilation, this may be a safe procedure. Before you get your paintbrush out, read on for some helpful hints on how to correctly paint a crib. We'll also discuss how some of our Neighbourly® home service providers may give inspiration, information, or services to assist you in creating a welcoming environment for your new baby.
See this article for the full review: https://tradingoptionsforbeginners.medium.com/paint-safe-for-baby-crib-ace6570f5599
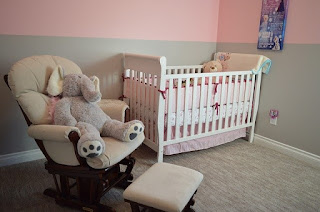
Inside is a white crib with cuddly animals.
Is Painting a Wooden Crib a Good Idea?
The first step in making a painted crib baby-safe is to make sure the paint doesn't flake or peel when it's applied. Wooden cribs are usually appropriate for painting. In any event, consult the crib manufacturer's instructions to see if painting is a viable option.
What Kind of Paint Should You Use for a Baby Crib?
Here are some things to think about while selecting a crib paint colour:
Choose only non-toxic (no silicates or lead) and odourless paint with no volatile organic components (VOCs). While the initial paint may not contain any VOCs, VOCs are frequently added when the paint is tinted to the desired colour. The SQAQMD-113 rule, which limits VOCs in both the paint base and tinting additives, has authorised a number of paints. It's a good idea to seek for a "Waterborne Interior-Acrylic-Enamel" that fits these requirements.
Choose paints that are EN71-3 or ASTM F963-17 approved for further peace of mind; these certificates indicate that the paint is safe for children's toys.
Sealants and paint additives not permitted for use on children's toys or cribs should not be used.
Personal choice determines the ideal paint finish. Many individuals like semi-gloss paint because of its appealing appearance, ease of upkeep, and durability once dry.
Painting Instructions for Cribs
Here's how to get ready for the job and plan your approach:
Are you wondering if you should paint when you're pregnant? Before you begin, read this helpful advise from the Five Star Painting® professionals.
Sand the existing paint until it's smooth if you're painting over it. Make sure you're working in a well-ventilated environment and that you're using a mask or breathing gear that's appropriate for the surface you're sanding (N95 or better for wood, N100 or even the P100 respirators for paint which may contain lead, oils or solvents).
If you're using an older crib, double-check that the paint is lead-free and non-toxic. Scrape it off when in doubt! For peace of mind, call one of Neighbourly's local paint experts if you're unsure or need assistance.
Have some colour fun! Consider neutral, metallic, or bright colours to contrast with the nursery's décor rather than typical gendered colours. Here are some wonderful colour schemes for a gender-neutral nursery.
For optimal results, use a high-quality, 100% nylon paintbrush.
Do not paint over crib safety features like screws or locks. Remove them if possible before painting and reinstall them after the paint is dry.
Allow the crib paint to dry in a well-ventilated environment, taking twice as long as usual.
Find out if there is a Five Star Painting near you if you want to leave the crib painting to the professionals.
How to Paint a Crib Correctly
Let the fun begin once you've decided which paint will keep your baby safe. The steps for painting the crib are as follows:
1. Sand the crib lightly.
Choose a sandpaper or sanding sponge with a medium 180-grit or fine 220-grit grit. Scuff sanding allows the fresh paint to adhere properly. Wipe away dust with a tack cloth after sanding.
2. Prime the crib with a primer.
Apply one coat of primer on your crib if it hasn't been painted yet or if you're altering the colour dramatically. Skip to step 4 if the crib is already painted a colour that is similar to the new one.
3. Allow enough time for the primer to dry completely.
The time it takes for primer to dry varies based on the manufacturer, the temperature in the space, and the humidity level.
4. Lightly sand with fine sandpaper one more.
A second, mild sanding – often known as "giving it a tooth" - promotes the paint to cling to the surface unless the paint instructions specify otherwise. Wipe the area thoroughly with a tack cloth once more.
5. Get started painting the crib.
Apply the paint in the direction of the wood grain with a high-quality 100% nylon brush. Avoid using a heavy coat since it might cause staining and leaking. Instead, apply one even layer of paint.
6. Apply a second layer of paint.
If required, apply a second coat of paint once the first has dried fully, making equal brush strokes and smoothing up drips.
7. Allow to dry completely before using.
Allow the paint to dry in a well-ventilated area for twice as long as the manufacturer suggests. Before utilising the crib, open the windows and turn on the fans to get rid of any remaining odours.
Make a Safe Environment for Your Child
Preparing your baby's nursery is a thrilling experience, but it can also be stressful. Having peace of mind and knowing your kid is secure and comfortable will allow you to enjoy this unique moment. Allow Aire Serv® to demonstrate how to properly set the thermostat to keep your infant warm.
Whether you need expert advice or services from our top-rated brands, the Neighbourly family of home service specialists is ready to assist you. Any home service you require can be found here or in the menu on our website.
Comments
Post a Comment